People always ask:
- Which resolution should I use for engraving XYZ?
- Why don’t we just use the highest resolution for everything?
Hopefully, this post will clarify this matter a little bit.
Let’s start with the laser spot:
- It is not always round. It could be a square, rectangle or oval depending on the technology used. For example, the LP1’s laser spot is roughly a 2:1 rectangle, and the LP2’s is a square. However, when they are in focus, they should appear as a tiny bright spot to the naked eye (not that you should look at it with your naked eyes), so we will use a round spot as a simple illustration in this post.
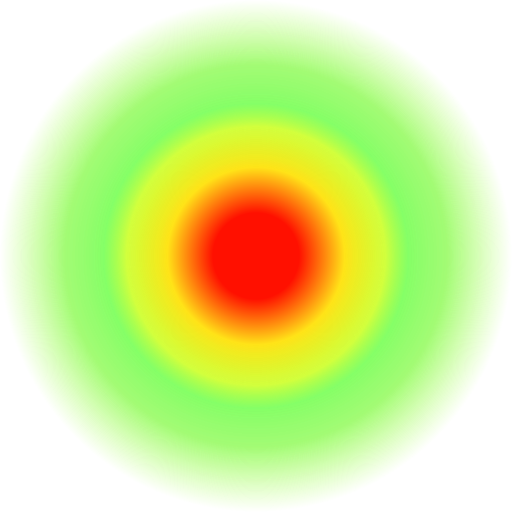
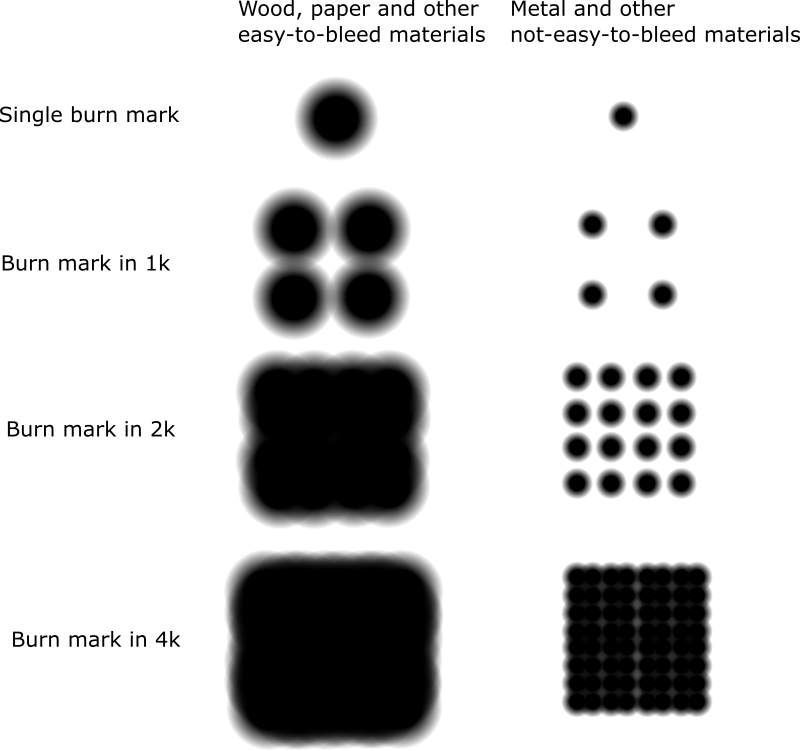
- A laser spot does not produce a burn mark like ⚫️ with a defined edge. As illustrated below, its temperature is the highest in the middle and reduces as it spreads out. So the burn mark is more like a blurry spot with a fading edge.
Now let’s look at engraving resolution. Again, the images below are for illustration only, not to scale.
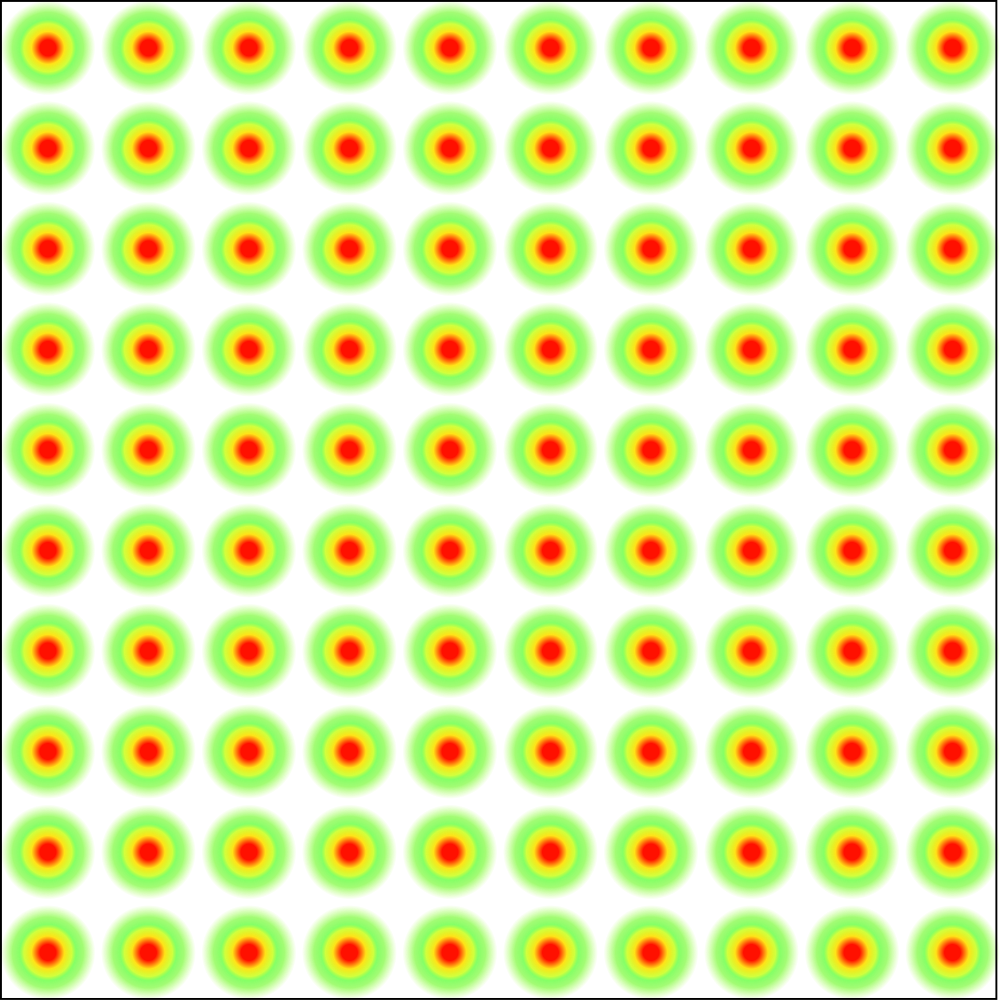
1k resolution (10 dots per mm), 100 dots per mm2
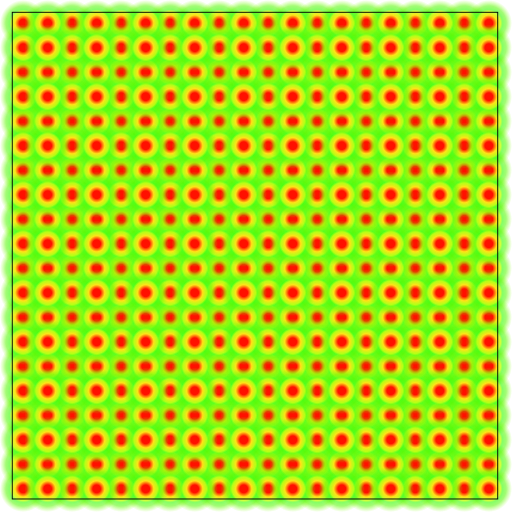
2k resolution (20 dots per mm), 400 dots per mm2
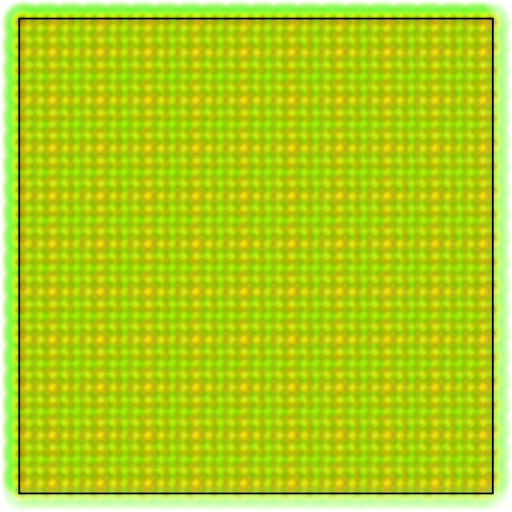
4k resolution (40 dots per mm), 1600 dots per mm2
Both low and high resolutions have their own pros and cons. There is no single option that works for everything.
As you see, in high-resolution, your image is reproduced with many more dots, hence more details. For example, a curve line may look like a zigzag line in low resolution, but much smoother in high resolution. However, the cost is longer engraving time, simply because there are more dots to burn one by one. If you look at the dot counts above, they increase exponentially, i.e. from 100 to 400 to 1600. Luckily, normally when you increase the resolution, you would reduce the power and depth (speed) settings at the same time, so the time required to engrave the same image does not increase exponentially, but enough for you to consider if it’s worth it or not.
As the dots increase, the distances between them reduce, and the actual burn marks are more likely to overlap due to the maths mentioned above AND the fact that some materials will “bleed” when burnt. Here, “bleed” is a borrowed term from inkjet printing. It basically means the resulting mark spreads larger than the intended area due to the material itself. For example, if you use a cigarette to burn a hole in a piece of paper, the hole is likely to be slightly larger than the diameter of the cigarette tip. Wood, paper and fabrics are some common materials that are easy to bleed. Metals are the opposite.
The illustration below roughly shows what the burn marks look like on different materials in different resolutions. I hope you can get why it’s not always “the higher the better”, especially on wood and paper. The overlapping areas get overburnt easily, hence actually reducing details.
Let me wrap up with a few rules of thumb:
- Higher resolution does not always give you better details.
- As resolution increases, you should at least reduce the depth and vice versa.
- For wood, paper and other easy-to-bleed materials, use 1k or 1.3k. You can use 2k if you really want to preserve the details in the image, but remember to reduce power and do some tests to find the optimal setting for your material.
- For metals, use 2k or higher.
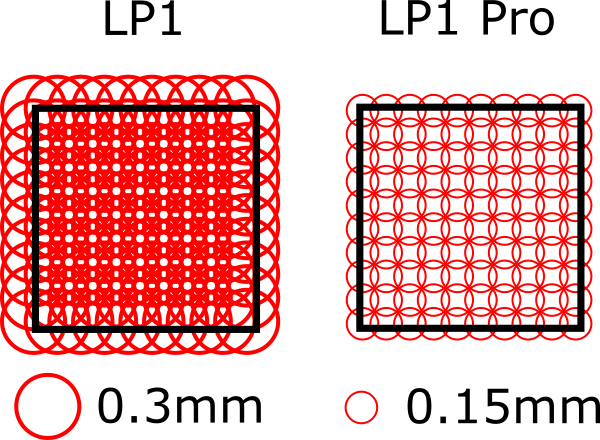
For LP1 and Pro, it is a bit different. These two models only support 1k resolution, and a more accurate illustration is as below since they have different laser spot sizes.
Was this helpful?
32 / 0